
My 2014 fridge calendar was so beautiful that I wanted to find a way to salvage / reuse the beautiful images.
At this point, you are probably well aware of my new love of making my own envelopes {remember that time I made envelopes from an old skirt magazine for the Bridal Tea party?}. I knew the weight and size of the glossy pages would be perfect for constructing envelopes so I saved a few of my favorites.
I saved some of my favorite pages from the calendar before recycling the rest. The pages had been sitting aside waiting patiently to be turned into envelopes for a few weeks now.


To get started you’ll need to gather these supplies:
- Calendar pages (alternate options: magazine pages, wrapping paper, scrapbook paper, etc)
- Glue stick
- Scrap paper for the address label (alternate: use a permanent marker if the design is light enough)
- Permanent marker
- Blank piece of paper (if you want to make a template to reuse later)
- Envelope (used or unused – doesn’t matter)
- Scissors
- Strong liquid glue or clear tape
- Washi tape
- Paper for envelope lining – optional
- A card that fits inside your envelope template OR make your own with construction paper, scrapbook paper or other colored paper pieces
Instructions:
Creating the Envelope template
If you have a used envelope whose size you like, deconstruct it by carefully detaching the sides and bottom of the envelope. Since you will be using the deconstructed envelope as your template, skip to the instructions for constructing the envelope.
If you have an unused envelope, you can create a template without deconstructing by following these steps:
1. Lift the top flap of the envelope (so that it is “open”) and align it with the top edge of the paper you are using to trace the template.
2. Trace the side edges of the top flap on the paper. Carefully hold the envelope in place on top of the paper and close the top flap. Trace around the rectangular body of the envelope (with the top flap down).
3. For the bottom of the envelope, measure the height of the bottom flap. On your paper template, measure the same distance (from the bottom of the envelope body outline) and draw a few marks. Connect the marks with a straight, horizontal line across the bottom of your template paper.
4. Measure the length of the top of the bottom flap (the area where the top flap would overlap when closed). It should be slightly less than the horizontal length of your envelope’s body.
5. On the line you have drawn at the bottom of your template page, draw notches that match the length measured in step 3 centered (as best you can) below the envelope body.
6. Draw a line from the bottom left corner of the envelope body to the left end of the line drawn in step 4. Repeat on the right side. The lines should be angled slightly inward.
7. Use the same method to draw the side flaps.
8. Use your scissors to cut around the outline of the envelope.
9. Fold the side flaps in then fold the bottom flap up. You can use a ruler to help with this by aligning the edge of the ruler along the folding line (outline of the envelope body).
10. Ensure that the side and bottom flaps overlap enough so that you will be able to glue them together. Also ensure that when the top flap is folded down, there is enough overlap so that you can secure the envelope.
If my directions are hard to follow, I suggest checking out these directions from The Postman’s Knock.
Constructing the Envelope
Once you have your template constructed (and tested to make sure the pieces align properly), you are ready to start tracing.
1. On the wrong side of the calendar pages (in our case, on the calendar grid side), trace the template using a permanent marker. Before cutting, make sure that the outline is lined up how you would like it on the image (pay particular attention to where the body of the envelope / middle rectangle aligns as this will be the front of your envelope).
2. Using your scissors, cut around the outer edges of your template outline.
3. Line your ruler up to the corners of the side flap (along the edges of the envelope body) and fold the flap towards the calendar grid (interior of envelope). Repeat for the other side flap.
4. Repeat step 3 for the bottom and top flaps.
5. Use your glue stick to coat the exterior of both side flaps where the bottom flap overlaps. Fold the bottom flap up so that it sticks to the side flaps.
6. Ensure that the envelope doesn’t glue shut by inserting your card or a piece of paper to separate as necessary. (Remove the paper or card / don’t leave the card inside the envelope while it dries.)
7. Set envelope aside to let glue dry.
8. Using a piece of scrap paper, write your recipients address and attach to your envelope using strong liquid glue or clear tape.
9. If you already have a card to use, go ahead and write a sweet note to someone you love. If you don’t have a card, cut pieces of construction paper / scrapbook paper / other colored paper slightly smaller than the body of your envelope. I found some colored 5×7″ card stock on clearance at Michael’s so that’s what I used 🙂
10. Put the beautifully written note inside the envelope and seal with washi tape. If you are feeling especially handy, you could try making your own envelope glue.
11. Send your lovely happy mail on it’s way! {Don’t forget a stamp!}
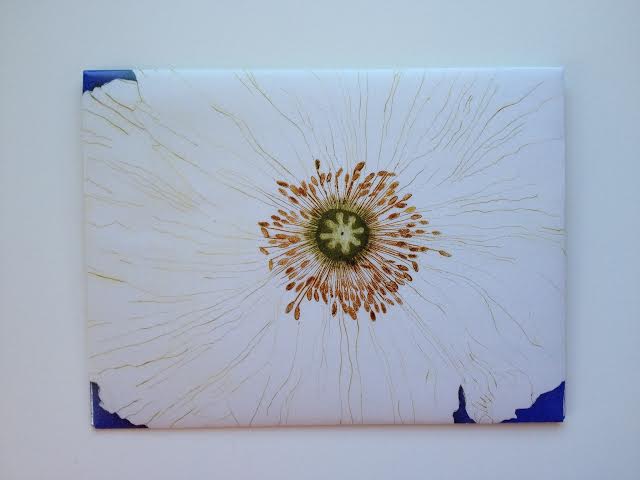
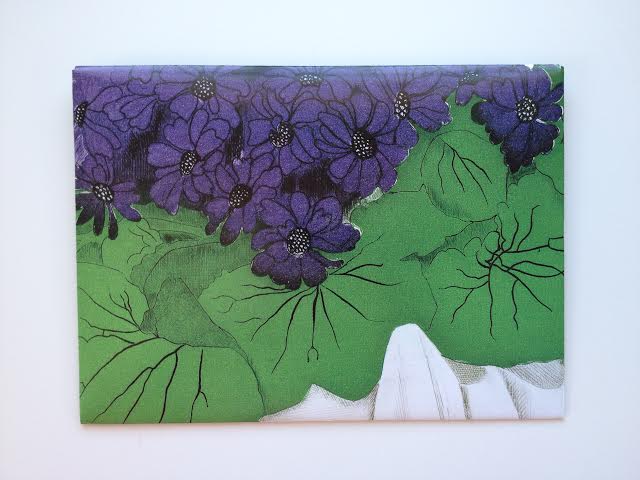
Here’s some envelope eye candy from my 2014 calendar…


I kind of like how the calendar grid peeks through on the inside of the envelope. To me it screams: “Once upon a time I was trash, but now I’m treasure!” 😉
If you want your upcycling to be a little less obvious, feel free to add a lining to your envelope. Martha Stewart has a nice how-to on envelope lining here or you can download her liner templates with this tutorial.

I picked out my favorite one and sent it to my Mom 🙂

A lesson learned: a glue stick isn’t quite strong enough to hold the address on (I glued paper scraps with the address directly to the front of the envelope). If it’s possible, I recommend using a permanent marker to write directly onto the envelope. For some of my designs (like the white flower), this worked, but for others (like above) that wasn’t an option. Next time I will try using my liquid glue or clear tape to keep it secure.
Luckily, the address piece didn’t fall completely off until it had reached my Mom (yay!), but I wanted to share a word of warning because it would be a real tragedy if your beautiful masterpiece didn’t reach it’s intended recipient!
A wall calendar is the perfect material for making envelopes. If you’re still holding on to last year’s calendar, give handmade envelopes a try!
Keep an eye out – these envelopes will likely make a reappearance in some future #reslicedHappyMail!


Love them!!!
Thank you MaryAnn!!
Gosh that last one is so pretty!!
Thank you Emily!
Lovely!! I’ve tried making envelopes from scrapbook paper. Epic Failure. I’m going to give it one more try based on your instructions.
Wonderful idea! Every January I’m trying to figure out what to do with the beautiful photographs from the previous year’s calendars and this works. Thank you!
Great! I’m so glad you like the idea! I hate throwing out beautiful calendars too 🙂
Very nice! 😉
Thank you!
anytime 😉