
It started out innocent: I was picking Andy up from daycare a few weeks ago when one of her teachers said they were going to have a Halloween celebration and the babies could dress up. At first I shrugged it off. Halloween has never been a real source of excitement for me so I was thinking I’d just put her in a festive onesie and call it a day.
BUT THEN I REMEMBERED I SEW (Ha! As if I’d ever forget). And that the internet exists (thus, “quick and easy” costume sewing tutorials would be in abundance…and they were).
Inspiration
I sent some ideas to my sister-in-law (because she always entertains my craziest ideas).
Initial costumes considered: Rosie the Riveter, a ladybug, a cookie sandwich, Cookie Monster, aerobics instructor, Iris Apfel, Frida Kahlo, Tina from Bob’s Burgers – we had some serious choices to make.
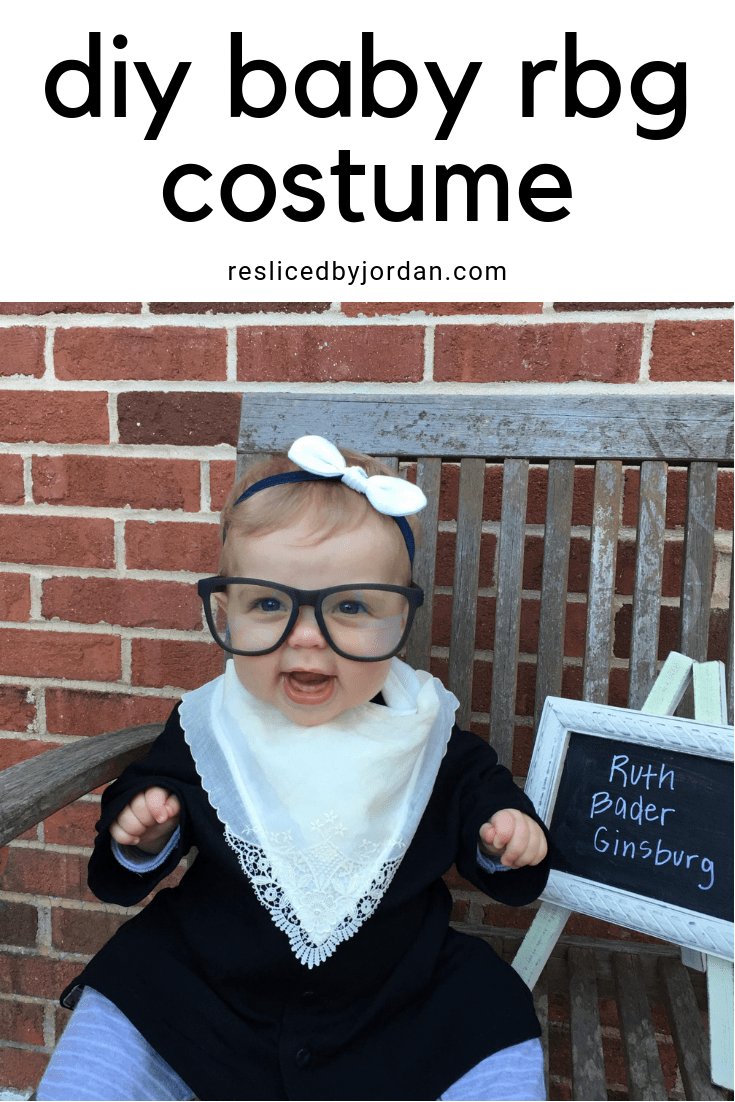
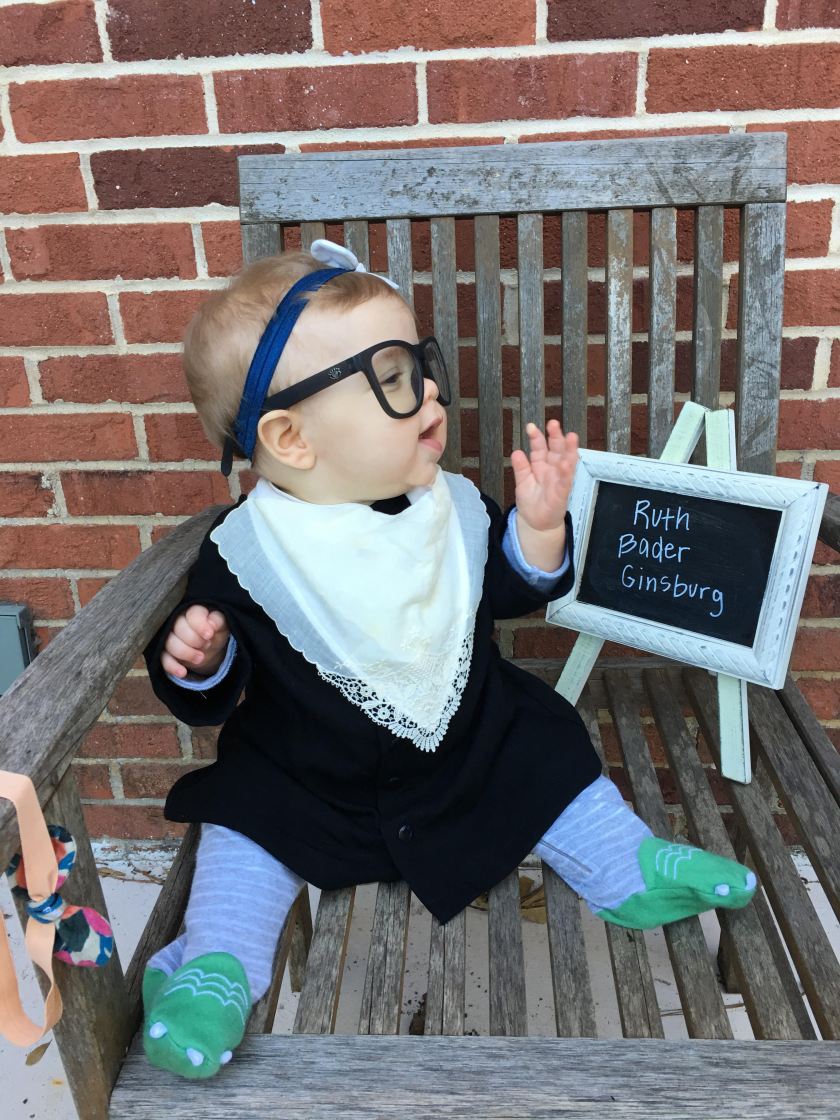
Ultimately, the vote was for Ruth Bader Ginsburg!

Originally I thought we’d go with a black onesie and a fabric doily (easy-peasy), but I decided to use what I already had on hand (aka: over-complicate this seemingly innocent costume adventure) with the picture below as inspiration:

Material
I’m really proud to say that I did not buy a single thing for this costume!
- The black fabric (crepe I think – donated from someone’s attic) for the robe was in my stash (as was the fabric used for the bias bindings).
- My Mom gave me a stack of vintage handkerchiefs a few years ago she got from an antique shop (I used some ivory rayon challis fabric scraps from my stash for the body of the bib).
- A friend let me borrow some snaps
* (for the front of the robe & the bib closure) from her stash.
- The glasses belong to the Hubs (no prescription – they are blue light blocking glasses – similar*).
- I made the bow a few weeks ago for a separate occasion (tutorial).
If you are looking to make your own RBG costume you might be surprised at what you already have that could work. Any type of black fabric (a bit of drape/flowiness would be preferable) can work for the robe. The costume just needs a black “backdrop” so alternatively you could use a black onesie or solid black outfit of any kind (this romper* or this footed sleeper* would be perfect!).
Rather than making a separate bib, you could just safety pin a vintage handkerchief or some lace to the front of the onesie/outfit (that was my original plan) or pin that to an existing bib (try to stick with a light color/no print so you don’t distract from the detail of the “collar”).
A toy gavel* would be a great addition to the costume.
The glasses could easily be a hang-up, but look what I found*!
The Pattern
I was limited on time so I immediately decided that the robe would be kimono style with no set-in sleeves. To get the “pattern,” I used a jacket she had that I knew fit her currently. I laid half of the jacket on top of the black fabric along the fold.

When cutting, I added space around the jacket for seam allowance. I wanted it to have a little extra volume (like an actual judge’s robe) so I graded out a little extra in the body. I didn’t include extra space on the length of the sleeves because I didn’t want them to be too long (and, again, to more closely resemble the fitting of an actual judge’s robe).

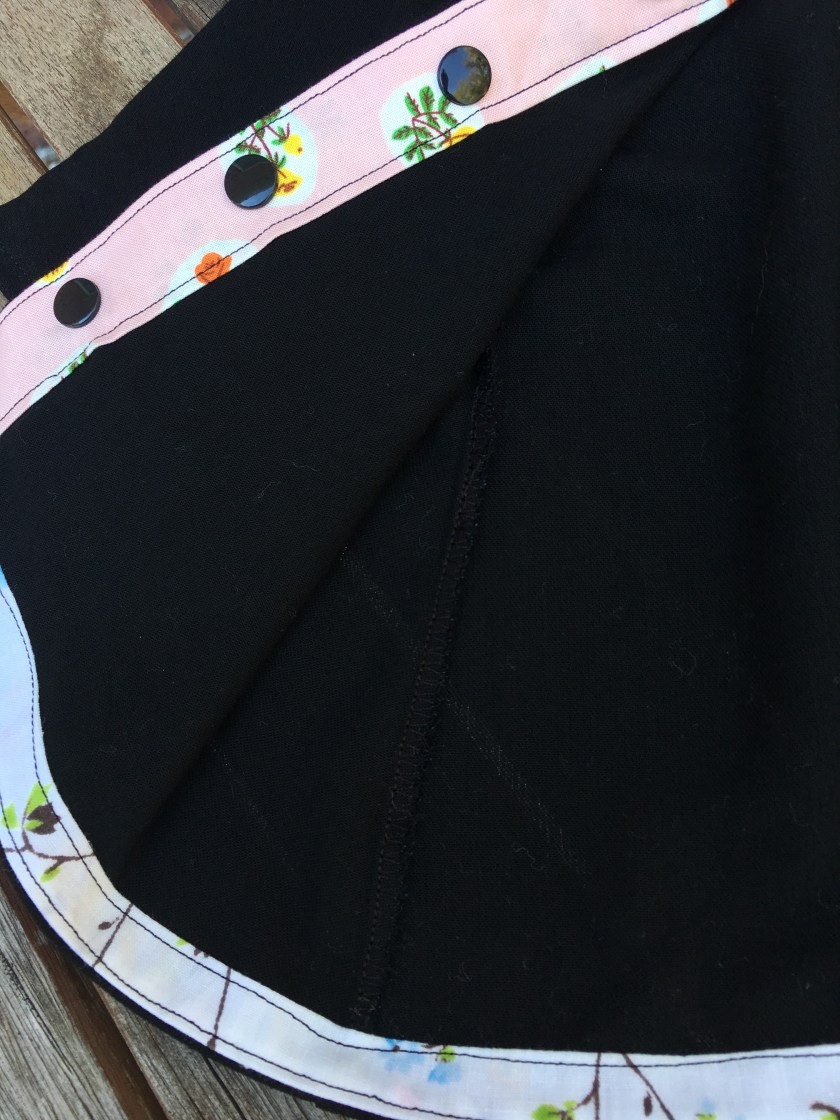
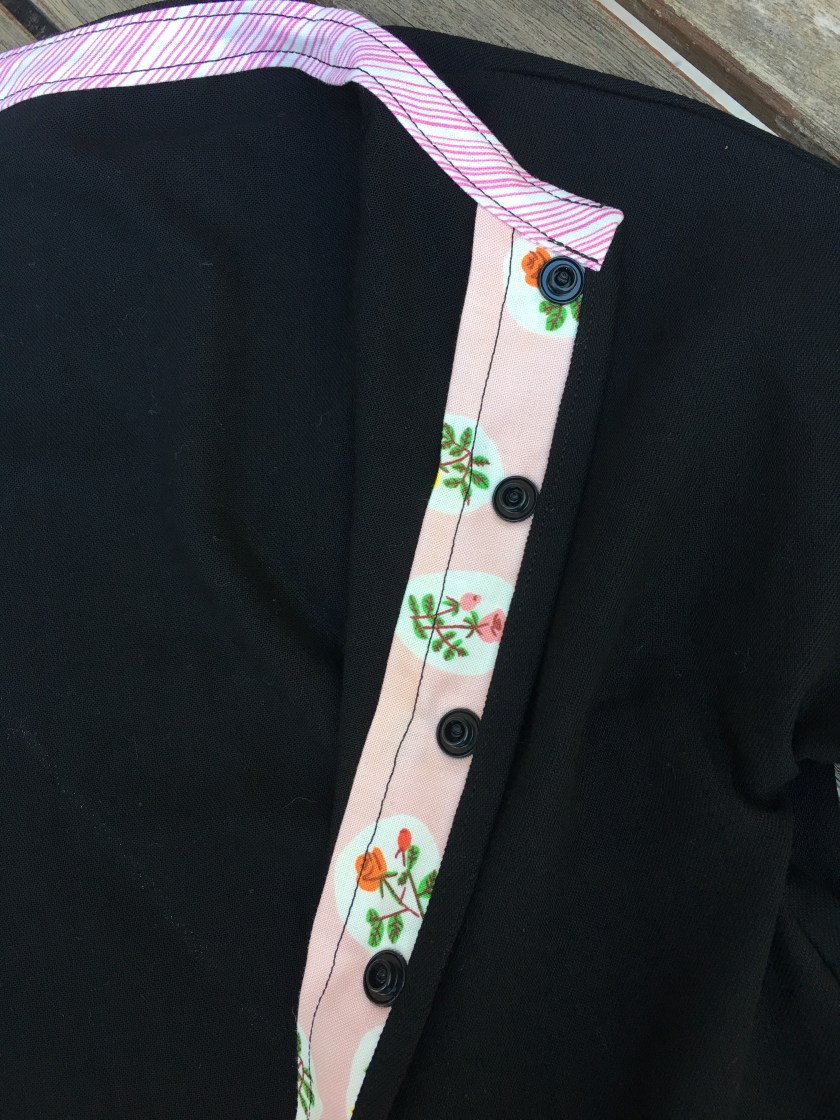
For the back of the robe, I cut on the fold. For the front of the robe, I cut the fabric on the fold the same way, but then cut up the fold afterward to create two separate pieces. I knew I wanted the front to open so it would be easy to get on a squirmy baby.

Since finishing a Dress No. 1 recently, I’ve been on a bias finishing kick (here’s a tutorial). I knew I wanted to – at least – use bias binding to finish the neck. After cutting the pattern out and sewing the front to the back, I tried it on Andy and realized that I didn’t want to lose much length. So, rather than flipping-and-stitching the hem, I decided to bias bind the bottom too.
Sewing the Costume
The Robe
I considered French seams (because you know I love them), but ultimately decided to use the overlock stitch on my machine to eliminate the extra step.
I stitched the shoulder (& sleeve) seams together at the top and then the front-to-the-back (including the underside of the sleeves) down the sides.
This is where I stopped and tried it on Andy to see about the fit.
Then I used scrap fabric to create bias binding which I used to finish the bottom hem > the front closure (like a faux button placket) > and the neck – in that order.
Last, I attached the snaps every 2 inches.
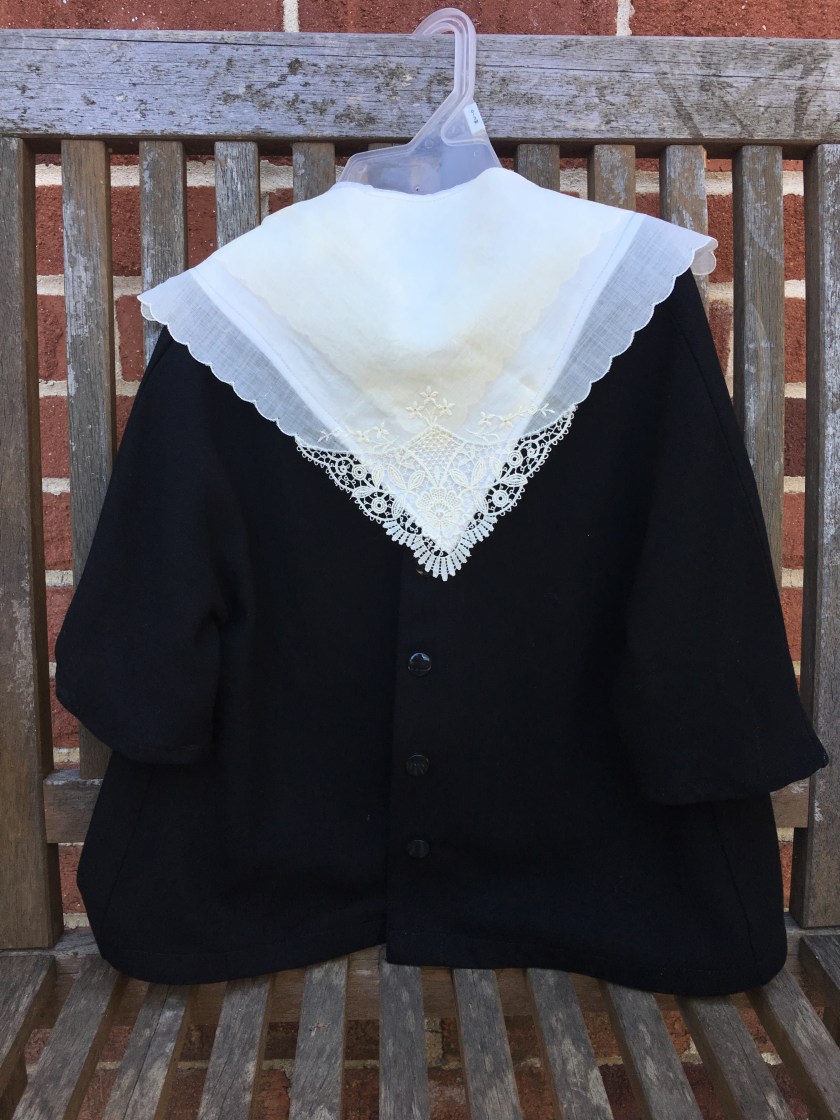
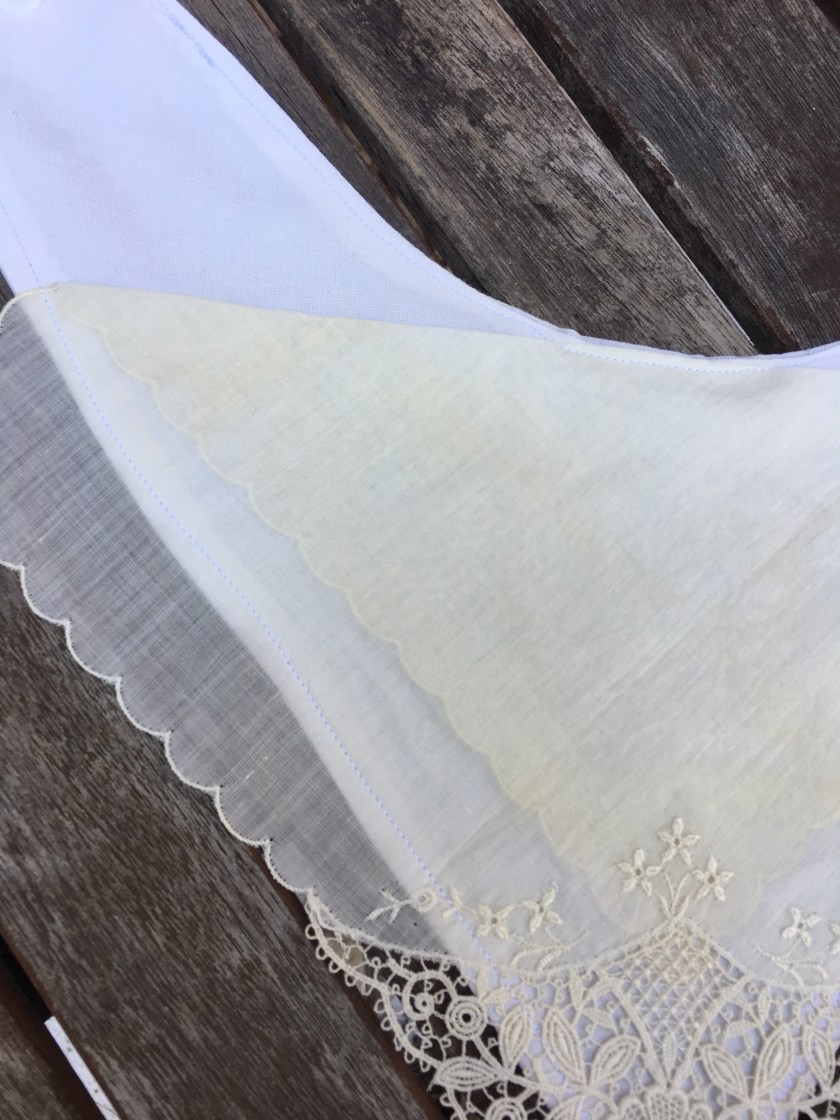
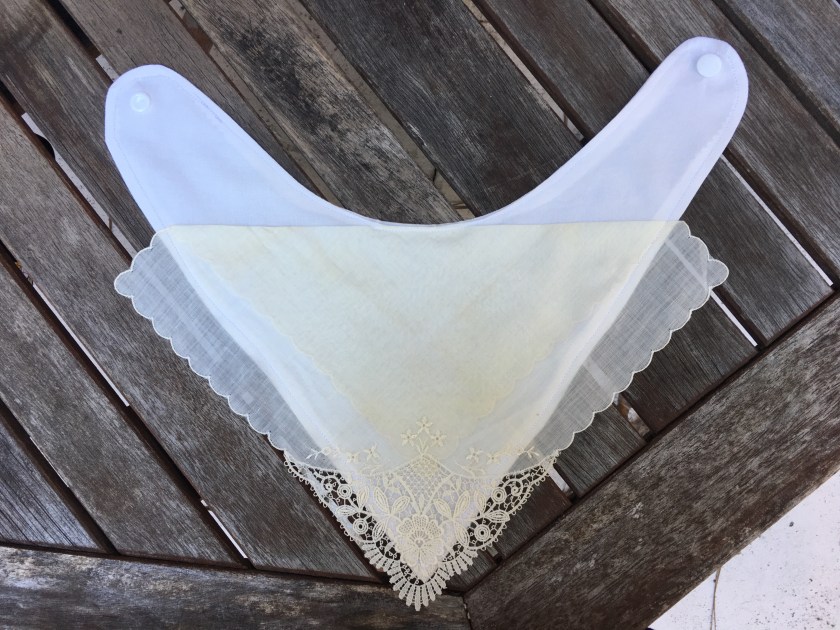
The collar
Because the laciest part of the handkerchief was at a corner, I wanted to make a bandanna style bib to show it off. I traced a bandanna bib Andy already had that fit well and used that as my pattern (if you do this, be sure to include an extra 1/2 inch around the edges for your seam allowance…or you can use this tutorial and pattern).
The rayon challis scraps I was using for the bib base were [obviously] super slippery. So, I used a tip I heard recently on the Love to Sew podcast and laid the fabric on top of some terry cloth (a towel would work) to keep it from slipping while I cut. That worked so well!
I constructed the bib by sewing RST, leaving a few inches unsewn at the neck, and flipping to WST. Before top-stitching, I placed the handkerchief where I wanted it on the front of the bib. I folded the top of the handkerchief by the neck since there was no neat way to get it to fold over the curved edge. I top-stitched around the bib like normal which held the handkerchief down without any extra (messy) stitching.
I tried the bib on Andy before attaching the snap to see if I needed to adjust the placement of the snap before attaching. Then I added the snap.
Don’t want to sew your own bib?
I totally understand.
You could pin a handkerchief or some lace to a pre-made bib like one of these*!
OR skip DIY altogether with this scallop-edged bib*! It would look great all by itself.
Accessories
The glasses
Originally I had asked the Hubs to buy some baby sunglasses that we could pop the lenses out of. Our local Target only had bigger kid glasses according to him and the two he brought home weren’t quite right (though one pair would have been perfect for Iris Apfel so I’m saving them for the future!).
On that note, I remembered that he had some blue light blocking glasses* that could work!
BUT hipster baby glasses* exist!
The bow
Obviously, RBG doesn’t wear bows, but I needed something to hold the glasses on so the elastic band bows I’ve been making came in quite handy.
More inspiration
We are certainly not the first to dress our baby up as RBG – check out these others:
- Alpha Mom’s DIY RBG Costume for an older child
- Where to get a baby RBG costume from Romper
- Easy, no-sew RBG costume tutorial from Primary
- Baby Liberty dressed up as many iconic women like RBG.
- These empowered female costume ideas from Refinery 29 are great!
- You could draw your own collar onto a black onesie with puff paint – like the last picture in this tweet.
- Ruth BABY Ginsburg (who was a boy, no less!) might have been the OG RBG.
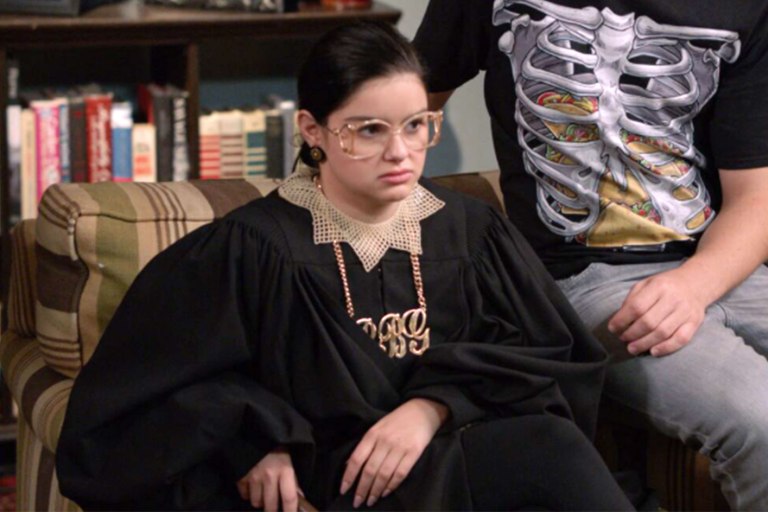
I was also excited to see Alex dressed as RBG on this week’s episode of Modern Family:
Not gonna lie, when I see Kate McKinnon slide on the screen during SNL‘s Weekend Update, it makes my day! Her impersonation is so funny.

Rock your RBG inspiration all year long
If you love RBG and want to stay inspired beyond Halloween, I found these super cool gifts (just in time for the holidays if you have an RBG lover on your list!):
- Children’s books that double as biographies are my favorite. Andy was gifted this one* and we love it!
- Empower a young lady on your list with this dissent collar necklace (or dissent collar earrings*).
- Stick this vinyl RBG sticker on your laptop.
- This RBG enamel pin* would look great attached to your cardigan.
- An RBG plush toy for the little babes or an RBG coloring book
* for the older babes.
- This RBG patch would be cute on a jean jacket.
- Get the guys in on the action with this dissent collar tie bar.
- Book lovers: I’m currently reading My Own Words*
.

–


Too cute!! You are so talented!!!
Sent from my iPhone
>
Thank you, Mrs. Nesbit!! 🙂