
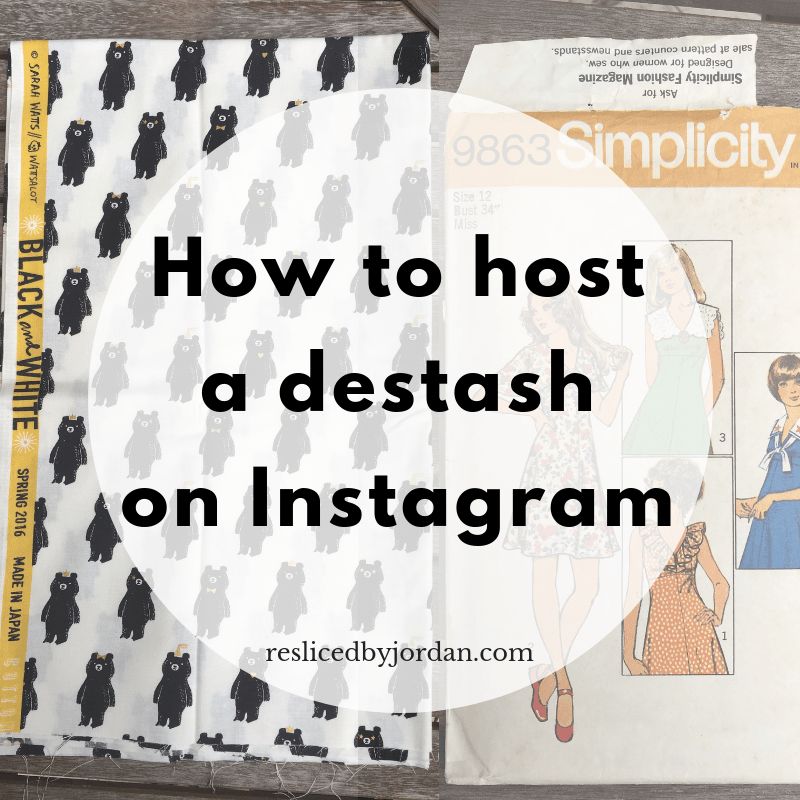
I recently hosted a destash on Instagram. While doing some research in preparation for the destash, I was surprised at how little information was out there despite how popular destashing is these days. That said, I’m hoping this post will be helpful to others!
This post is heavily based on hosting a sewing supply/fabric destash because that is my craft of choice. However, most of these tips are universal.
Steps to hosting a destash
1. Do your research
Here are some places to start: this is a list of great tips for a successful destash, here’s a post with destashing tips that go beyond hosting a sale on Instagram, and this step-by-step guide is from a paper crafter but her tips are super useful.
Ask for advice
I have a friend who hosts regular destashes that I reached out to immediately when I decided to host one of my own. She gave me lots of good advice and was there to answer questions as they arose. If you’ve got a friend who’s hosted a destash before, ask for their advice! If you don’t, find someone on Instagram – I received a private message from someone I have never met asking a question because she was in the process of doing some research to host her own destash. I happily shared what I learned in real-time–and, to be honest, she is the inspiration for this post!
–
2. Gather the items for your destash & determine a schedule
Limit on maximum posts per day
I was not able to find an official statement from Instagram, but according to others you are limited to 100 posts per day on the platform.
Take this into consideration when planning your sale – you may need multiple days.
Separate into categories
When the declutter bug bit me, I started gathering items I was ready to part with and quickly realized that everything fit neatly into 4 categories: Books, Fabric, Patterns, and Supplies.
On that note, I decided to break my destash into 4 parts to post across 4 days:

Alternatively [if you have fewer than 100 items], you could post them all in one day, but separate them into categories by creating “divider posts” announcing that one section is done and you are posting the next (similar to how I posted at the end of each day – example).
Post across multiple days
I highly recommend considering it if you have a lot to post. It creates some additional anticipation for your followers and also gives you time to catch up so you’re not too overwhelmed.
–
3. Develop a shipping plan
First, decide whether you want to offer international shipping.
Due to my limited experience shipping overseas, I decided against offering international shipping for my first destash. If you are comfortable shipping overseas, go for it – it’ll immediately expand your pool of potential customers!
Second, decide WHO will ship the packages.
This goes back to your shipping experience. I have had great success using my local USPS for shipping packages so I knew they were the carrier I would use.
Third, decide HOW you will ship the packages.
Options:
- Purchase your own shipping supplies. You can do this on Amazon* or reuse boxes/folders/envelopes you already have (just be sure to remove any labels from the previous contents or wrap in Kraft paper
* to avoid confusion).
- Use flat rate envelopes/boxes. You can have the USPS ship flat rate shipping supplies directly to your home for free (so convenient!). Then you just pay the postage when you ship the package(s).
I chose to use flat rate shipping. The legal flat rate envelope was my most-used size. It was great for fabric and patterns. If you will be shipping items more delicate items, you may want to get some padded envelopes and/or boxes (medium, size 2 worked best for me).
If you have a scale to weigh your packages, you can calculate the shipping online pretty easily. Honestly, if I were savvier, I would have done that. The cost of shipping deterred at least 2 purchases that I was made aware of. 😦
Flat rate shipping is more costly for the buyer but more convenient for the seller – there are pros & cons for each option.
Fourth, determine shipping costs.
Once you have decided on your carrier, search their site for a shipping cost calculator. Here are links to a few: USPS, UPS, and FedEx.
For reference if you are using USPS Flat Rate shipping:
- Shipping cost for the legal flat rate envelopes (most useful for me) = $7.00
- Shipping cost for the padded flat rate envelopes (best for delicate items) = $7.25
- Shipping cost for either size of the medium flat rate boxes (I only used one of the size 2 boxes I ordered) = $13.65
** shipping costs noted are current as of the time of this post (October 2018).
Other options to consider:
- You could include shipping in the price you list for the item.
- You could add shipping estimates to each item individually (this sounds really time consuming, but you do you).
- You could provide shipping estimates based on the amount purchased (based on yardage if you are just selling fabric or number of items if you want to encourage larger quantity purchases, etc.).
- You could calculate shipping after the order has been placed (so you can combine all items the buyer requests then have one shipping estimate for everything they choose).
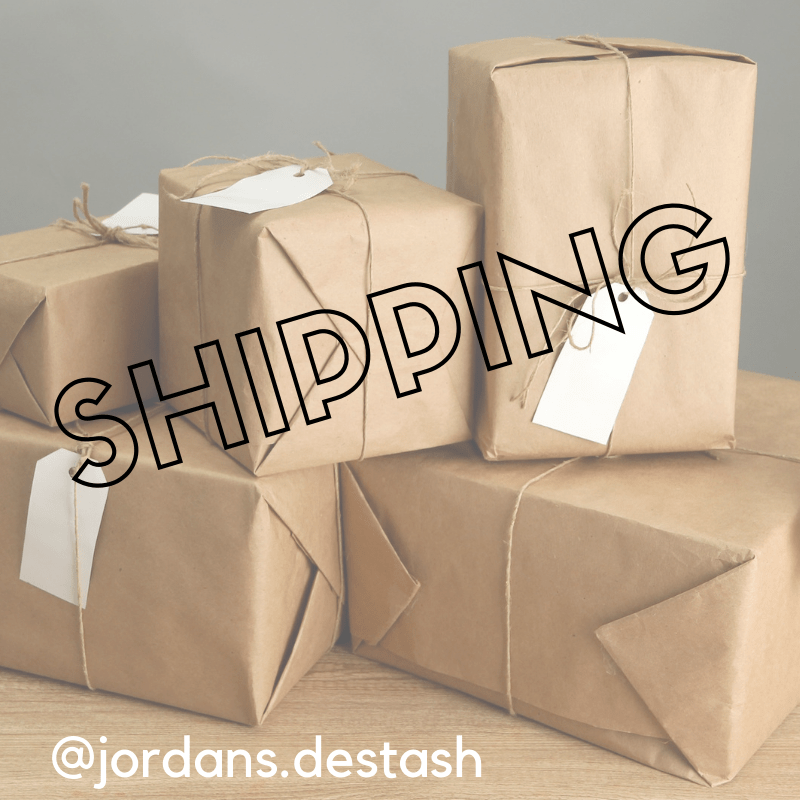
Whatever you decide, specify clearly either in each individual post, your profile bio, and/or in a separate shipping post – make the information easy to find and understand.
Fifth, decide WHEN you will ship packages.
If you are hosting a multi-day destash (like I did), I would recommend shipping after the final day. So, my destash was Monday through Thursday with posts each night. To give enough time for customers to shop and for me to sort/package orders, I shipped the Monday after my destash began.
If you are posting your destash all at once, you may want to ship within a certain time-frame (example: within 3-5 days of payment received).
Last, draft your shipping “rules” to post.
Options:
- Include brief shipping information in your bio.
- Draft a separate post only about shipping (if you have a lot of shipping details you want to provide, this is a good option).
- Include your shipping information in your general rules post (this is good if you want to keep the important/pertinent information condensed to one post).
If you have an iPhone, use the “Notes” app on your phone to draft your shipping rules. Alternatively, you could use Canva or a similar program to create an image with your shipping rules listed (like this one).
–
4. Create your RULES
Every destash needs rules so customers know what to do to claim the goods.
Take a look at destash accounts you already follow and/or find some to check out – examples:
- MINE (pictured below)
- @whatkatiesews_destash – she posted multiple images to flip through for the rules. I really like this idea – it’s so creative and really great for visual people/people who refuse to read long posts 😉
- @kelbysews_destash
- You can list your rules entirely in one image like @iamlunasol_destash.
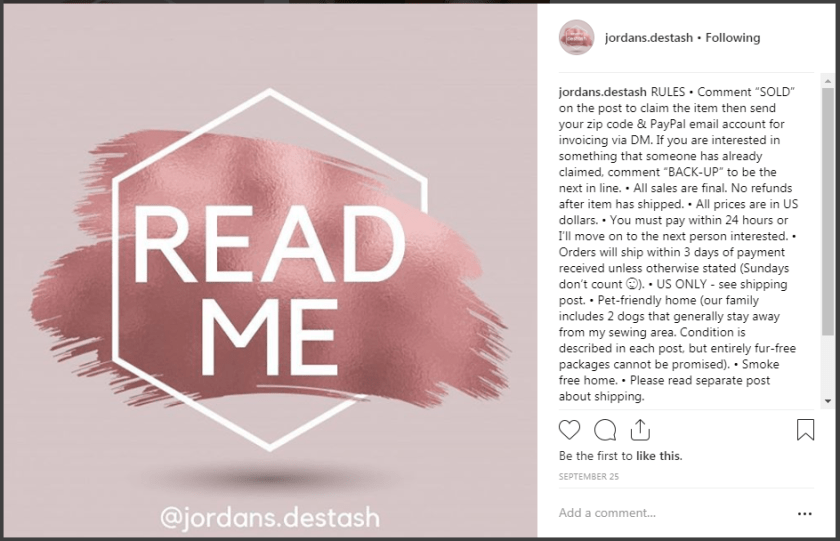
This needs to be THE FIRST post so be sure you have it drafted and ready-to-go as soon as you create your account.
Create an image that stands out so that when followers visit your profile, they can tell immediately that it’s not a post of something for sale. I created a graphic in Canva and included “READ ME” in the image so it was obvious.
–
5. Organize and track your inventory
Create a method that works for you to track your inventory/destash items. I created a Google Sheet for ease and accessibility, but an Excel spreadsheet or even a paper notebook (just don’t lose it) would work just fine.
Below is a screenshot of my “inventory” spreadsheet:
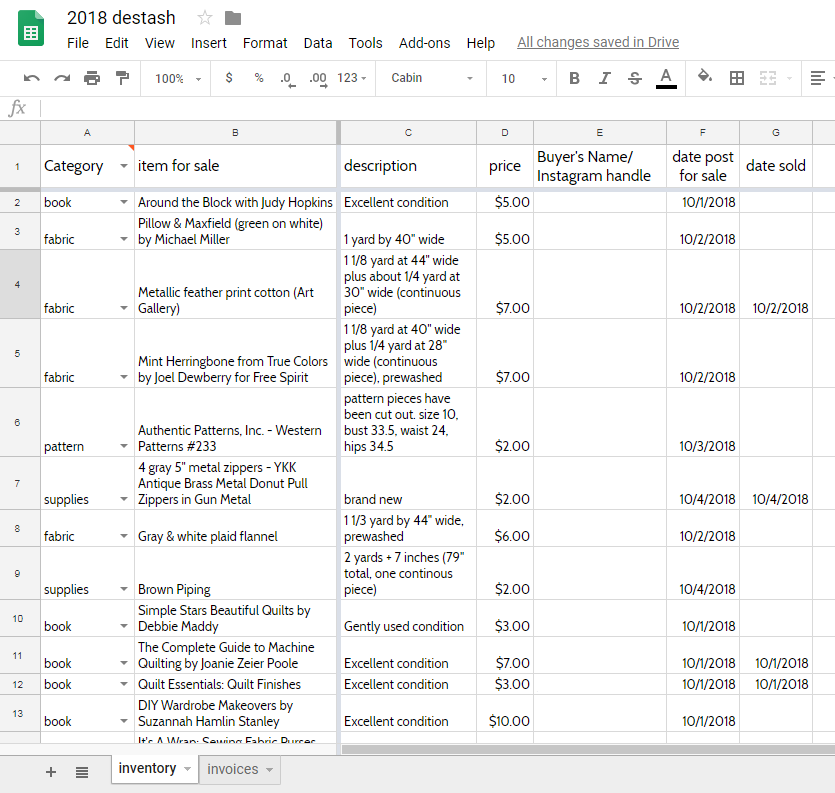
If you have receipts from your original purchase of the item, reference those for pricing. While you hope to generate money from your destash, do not expect to profit. You are reselling items not selling brand-new inventory. Price your items to reflect that.
If you are not sure about how to price an item, do a quick google search to see what it’s selling for online. For fabric, you can find information about the designer and collection on the selvage so use that information in your search and again in your post (i.e. listing for the customer).
–
6. Take photos of your inventory
Try to use natural light – if you have a table or clean space outdoors, that’s a great option. You could put a white sheet on some grass or your driveway to protect the item and provide a neutral backdrop. Or if you have a well-lit room/clean space by a window, that’s a good indoor option. Just do your best to accurately capture the color of the material and condition of the item (take close-up/detail shots of any “blemishes” and convey in the listing).
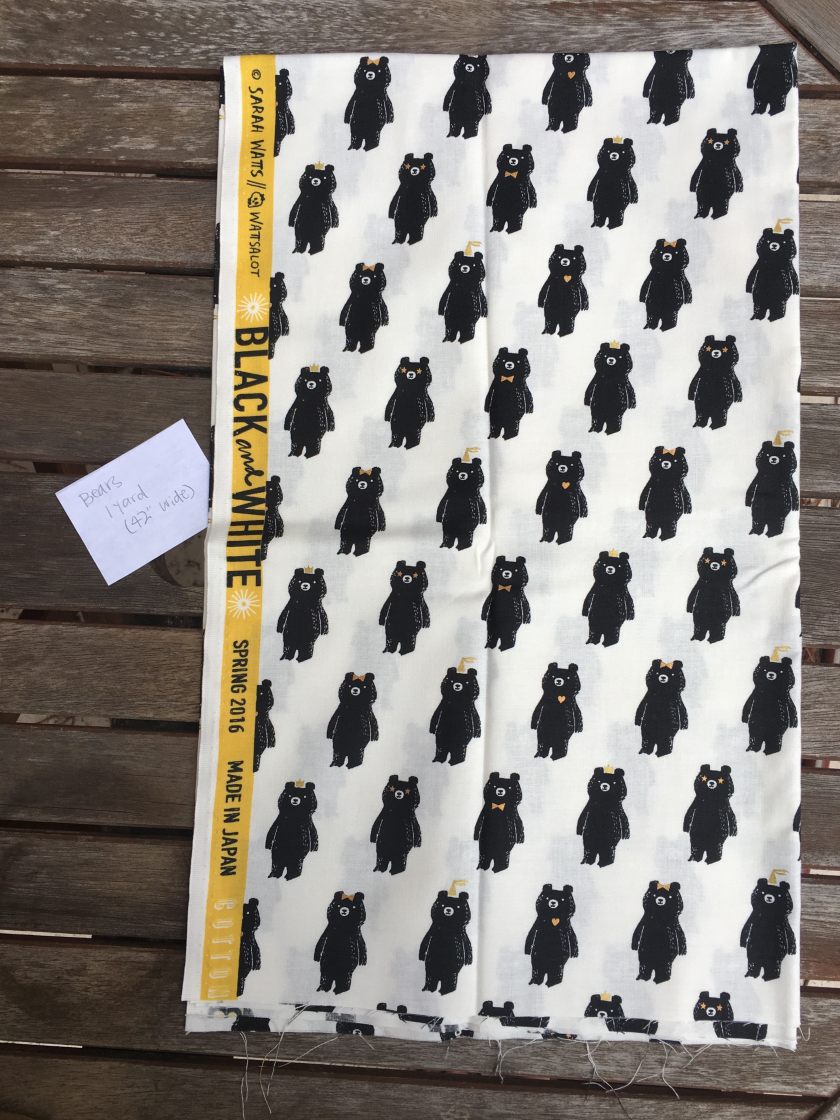
Include identifying information in the photo (optional)
Not only does this help the customer, but it will help YOU when you start drafting your posts.
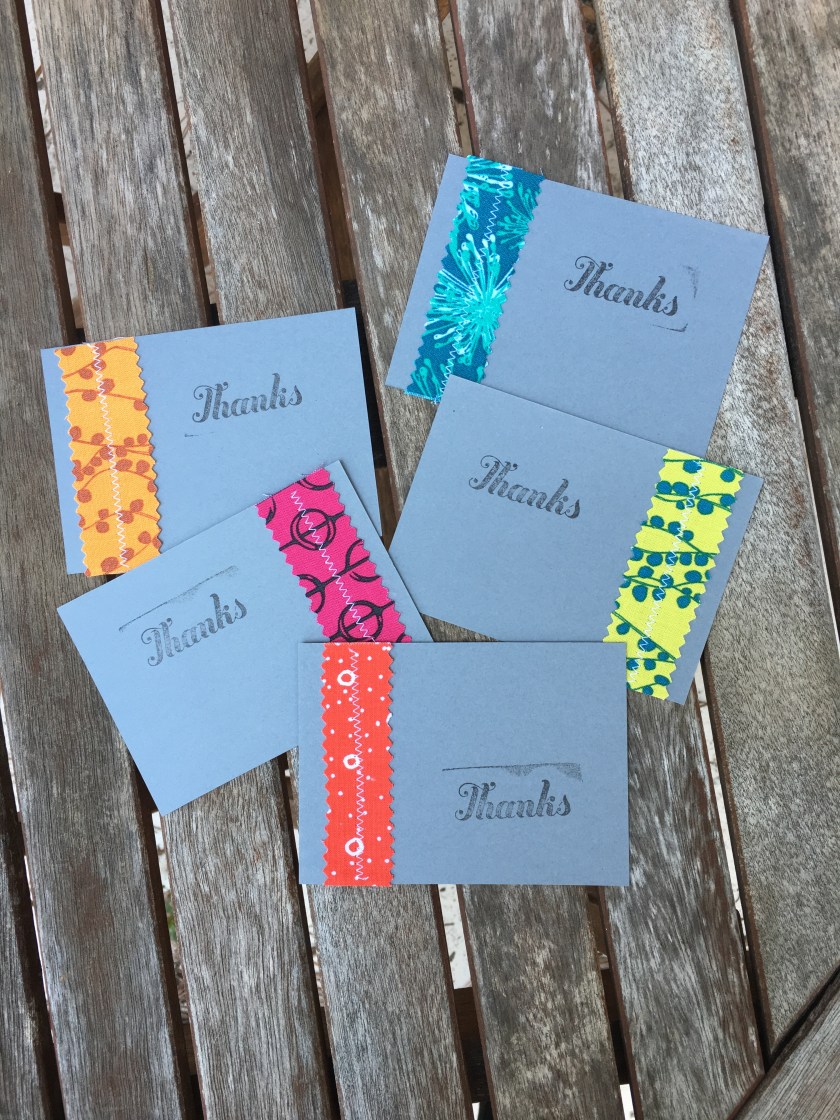
I used pieces of scrap paper – below is an example:
Take detail shots
If you have an item with a special detail (or flaw), take a close-up photo and include it as an additional image (Click here to learn how to share multiple photos in one post on Instagram).

PS: You don’t need a fancy camera for photos – I used my iPhone. While you want to take the best possible pictures, you are not opening a professional store. This is a DESTASH – think of it as a sophisticated garage sale 😉
–
7. Create your account
Choose your handle
Most people just add “destash” to their current Instagram profile name so that it’s easily identified with them. Add a period (.) or underscore (_) before “destash” to separate visually.
My personal account has a somewhat long handle (@jordanslicemet) so I condensed it a little for my destash handle and just used my first name: @jordans.destash.
Write your bio
Information to include in your bio:
- Who you are (name/personal IG handle) – You can link your personal account so people can click over and get an idea for your aesthetic.
- What you will be destashing (i.e. “sewing supply & fabric destash”)
- Basic rules and shipping information (there’s a character limit so keep it short)
–
8. Promote your destash!
Share about your destash on your personal Instagram account and with all of your sewing friends. You may even want to share on Facebook or other social media platforms.
Unless you have a large following on your destash account already, I would recommend sharing and promoting your destash for a few days before you launch the sale (I wouldn’t wait any longer than a week because people will lose interest/forget).
Share about your destash AFTER you have 1) created your account so you can link to it, 2) posted your RULES, 3) posted your shipping “policy.” I would also add a photo after your rules & shipping with information about WHEN the sale will start or include the dates/times in your bio. (I recommend separating your rules post and your sale dates so that when the sale is over you have the option to delete the post with your dates but keep the rules posted.)
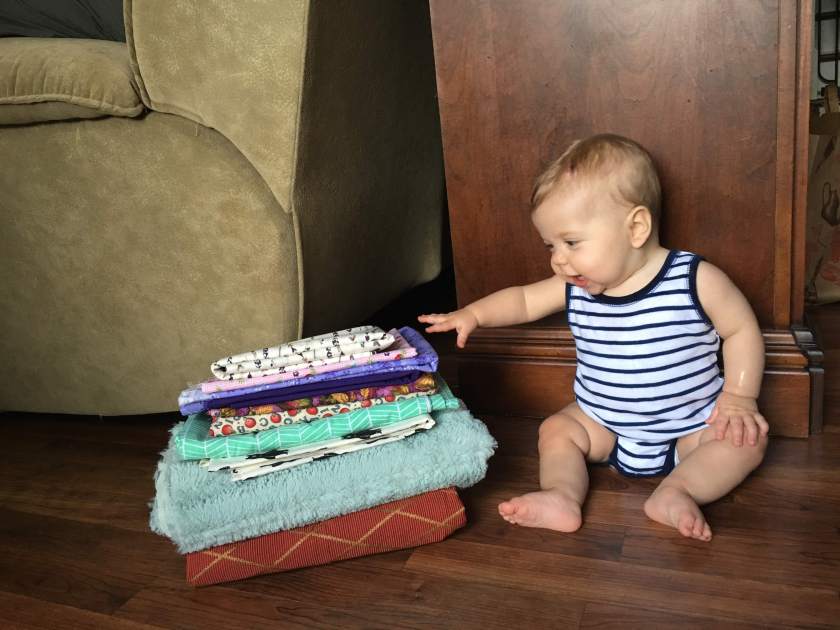
Share sneak peeks
Leading up to the start of your destash, try to share sneak peek photos (example: I shared the photo below of my daughter with some of the fabric we were measuring in preparation for the detash).
To stay “relevant” (aka: active/in your feed), you could post related quotes, memes, etc. Just make sure they are relevant and [obviously] not offensive (stick to your topic at hand – no politics or opinions about things other than how great your destash items are).
Example: I shared this post in the days leading up to my sale.
–
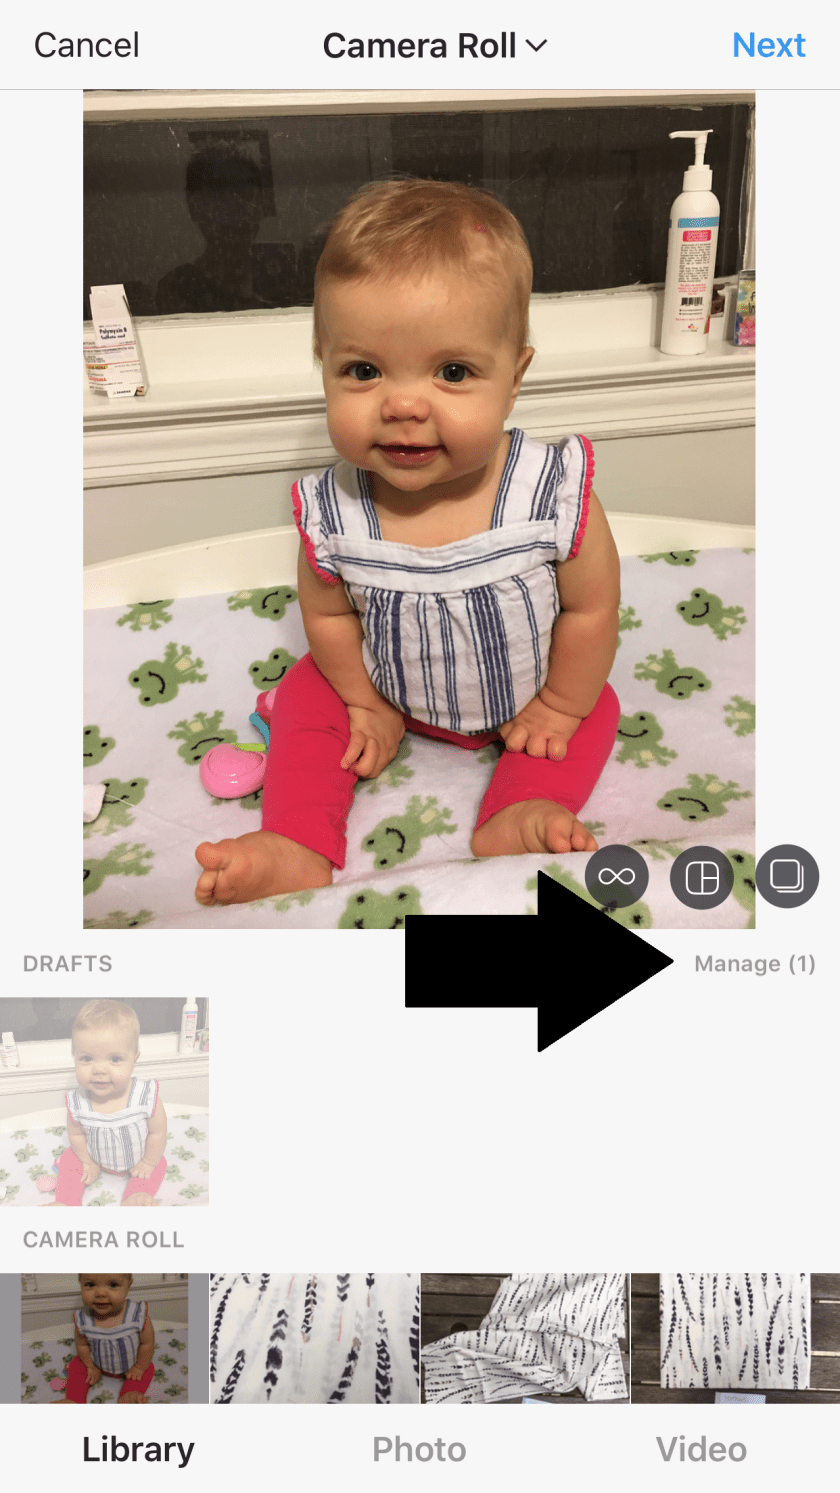
9. Load your posts as DRAFTS before your sale
Mega-time saver!
After you have your photos, start loading them into your Instagram account as drafts.
Click here for the official instructions, but below is the jist:
- While logged into your account, click on the + icon in the middle of your screen to start a post.
- Select your photos and proceed.
- Enter your caption then click the backward arrow in the upper left corner of the screen.
- Click the arrow again and click “Save Draft”

I have not been able to find a limit for the number of drafts you can have loaded at one time. However, I’ve had over 20 at a time with no issue. To note, only 4 drafts will show when you click the “+” button to post. If you click “Manage” (see image below), you can then access all of your drafts – this is helpful if you are trying to post in a certain order.
Include relevant hashtags in your posts!
When drafting your posts, be sure to include destash-related hashtags. Below are a few I used:
- #thegreatfabricdestash / #greatfabricdestash
- #fabricdestash / #destashfabric / #patterndestash – try your craft followed by destash or vice-versa.
–
10. Post your items
The moment you’ve been waiting for!
I advertised that I’d be posting at 8:00pm EST (I picked this time because I could guarantee my hands would be free since it’s after Andy goes to sleep 😉 ). I set a reminder on my phone to go off at 8:00pm to remind me to post for that day (I also set one to remind me to construct the draft posts).
Because I already had my posts saved as drafts, I had everything posted within minutes (no staying up late for me!). HERE are official instructions on how to share posts saved as drafts.
I highly recommend creating a post to notify followers when you are done (so they’re not waiting around to see what’s coming next).
Because my destash spread across multiple days, I posted an “end” photo each evening (example). This was also good as a visual separation since the days were chosen by the type of item – so, followers could go to my profile and scroll between each of the “end” images (they were consistent visually) to see a particular group of items.
Include information in your “end post” relating to when buyers will receive invoices (or if they already have) and when to pay, when to expect packages to ship, or any other remaining information (you could even offer a discount on anything that is still available).

–
11. Track purchases.
I created a second spreadsheet within the same workbook I used to track inventory called “invoices” where I tracked information for items that sold.
In this worksheet I tracked the buyer’s name, items for their invoice, costs (I built formulas in some of these cells to sum/total for me), PayPal email address, dates, address, and tracking number for the package. I have blanked identifying information in the screenshot below. The yellow cells indicate information that I needed/did not have.
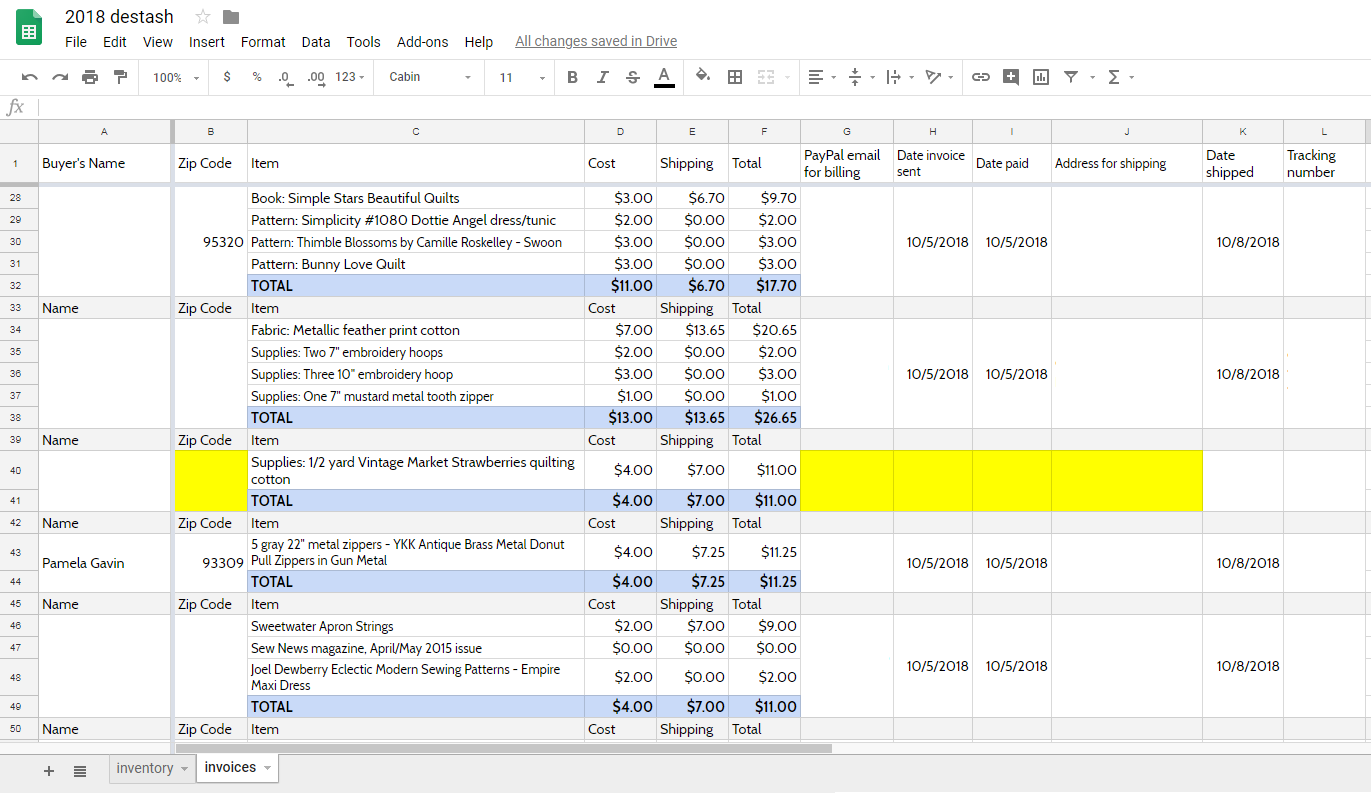
At minimum, I highly recommend tracking purchases including all information for the buyer that you need for invoicing and shipping. This is good to have on hand if you ever need it for reference (at least until the package has been confirmed as delivered).
–
12. Send invoices & collect payments.
PayPal is the most popular method for destash payments. It’s very easy to “request money” from someone as long as you have their email address.
I sent the invoices as requests for payment and included a list of the items they purchased in the notes area for reference. Alternatively, you could create a more formal invoice.
PayPal does charge a small fee so take that into account with your pricing. Despite the fee, I think it’s well worth it for convenience.
–
13. Provide high quality customer service.
You are technically running a shop of sorts so treat your potential buyers/customers how you like to be treated when shopping.
- Respond promptly to comments and DM’s. Your efficiency at answering customer questions can impact your sales. {PS: Be sure to check your message requests in case you are not following the sender – here’s how to}
- Provide updates to buyers via DM. Keep your buyers updated throughout the process (i.e. let them know when you send the invoice, when you receive their payment, when you ship the package, etc.).
- Upsell, but don’t be pushy. Because I was using flat rate shipping, I was motivated to stuff the packages as full as possible (I always want to get my “money’s worth” 😉 ). So, I messaged customers after they chose their initial items to ask if they wanted to add anything without increasing their shipping – particularly for orders that had a lot of extra space in the package. This was helpful both for me (it helped me “move more inventory”) and for them (spreading shipping costs across multiple items is more economical). Be careful with this: Try to present this offer softly with an easy way for them to decline kindly and respect their choice.
- Include a hand-written note. I used to do this when I had an Etsy shop. It’s always a nice personal touch to receive a hand-written note when you order something online.
–
14. Remove posts as you ship them.
Nothing is worse than opening a destash account, falling head-over-heels for something they have posted only to find that it has already been snagged by someone else in the comments.
This isn’t so bad if the item hasn’t shipped yet (i.e. your sale is still open/has just begun) because a person could comment to be a back-up in case the original buyer passes on the item).
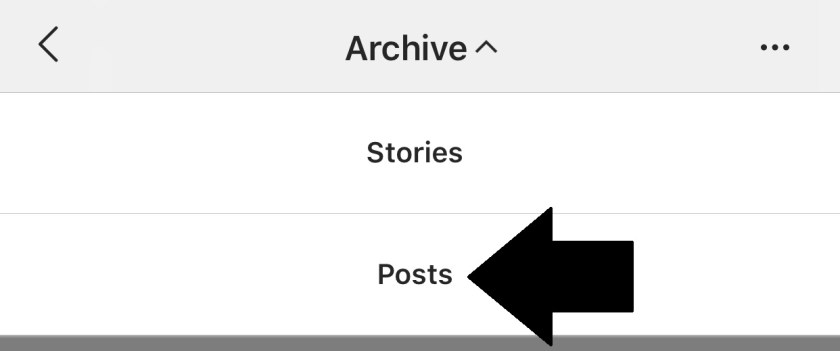
Once the payment has been received and the package has been shipped, ARCHIVE the post. Archiving the post (rather than actually deleting the post), will remove the post from your feed (i.e. it will no longer be visible to potential customers as they view your profile and posts). You can do this by clicking the 3 dots in the upper right corner then choosing “Archive”:

Archiving a post is handy because you don’t lose the original post information – including comments. So, if you ever need to reference that information in the future, you have it!
To view a post after it has been archived and/or to add it back to your feed: click on your profile then click the clock circle icon in the upper left corner. When I did this, I was confused because I didn’t see the posts. If you click on the arrow at the top of the screen, you will be given the option to switch to archived posts (it appears to default on stories):
HERE is more information about archiving a post on Instagram.
–
Phew! I know that was a lengthy guide, but I hope you found it helpful.
If you are hosting a destash, leave a link to your account where others can shop in the comments below!
–


Thank you for taking the time to write this! I’m thinking about a major destash, and your post was extremely helpful!
Oh, yay! I’m so happy to hear that. Please come back & share the link for your destash once you have it set up! Good luck!
Hi from @bordeauxbound and thanks for the DMs as well as all this info! I have ordered my supplies and plan to start after a trip away that I have planned next week. Thanks again for all the help!! Linda
I’m SO glad you found the post, Linda! You were the inspiration. Please come back & share the link to your destash when you set it up so we can follow along! Good luck!!
Thank you, Jordan! I have been trying to decide how to de-stash and I think I’ll give this a try, you make it seem so doable! Fantastically thorough!! Much appreciated!
Thank you, Jo-Cinda! I am so happy you found the post useful and encouraging – it really is so easy and definitely worth the effort 🙂 Best of luck with your destash!!