
I’m really loving paper piecing! If you haven’t tried it out yet, you totally should. It’s much easier than you think (I was overthinking it until our quilt guild president de-mystified the process during a demo at a recent meeting. Here’s a tutorial with some great pictures).
After playing around with paper piecing with the basic diamond template Amber shared with us at the meeting, I started searching the internet for more templates to play with.
It didn’t take long to find a flying geese pattern that I loved! I followed these instructions and shrunk the pattern by 33% when I printed. It’s the perfect size for a pin cushion which is great because this month our quilt guild hosted a pin cushion swap!

My partner loves batik prints so it was a chance for me to work with a fabric that I don’t normally use. I found some fat quarters at JoAnn’s and used green for the geese and purple for the background pieces. I used a fun blue print for the bottom of the cushion.
I used some scrap batting to line against the goose block. Rather than quilt the geese (I really couldn’t figure out how to do that without ruining the design), I added a border and then stitched around the border with some fun blue thread I picked up at an estate sale.
I stitched the batting to the flying geese block then set it right-sides-facing on top of the bottom piece and then squared them up (cutting the edges) so they were the same size. Then I stitched all around the sandwich – leaving a few inches open at the bottom for flipping.
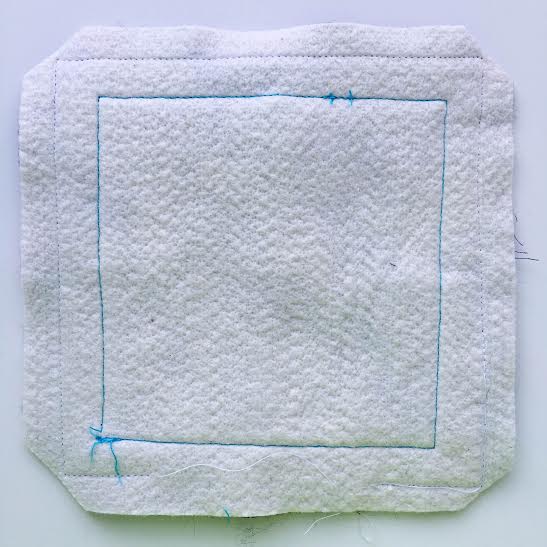
Then I clipped the corners so they would be pointy when flipped (watch out for your stitch line so you don’t accidentally cut into it!).

I flipped the cushion so that right sides were now facing out and hand stitched the closing using a blind stitch {here is a tutorial with great pictures}.
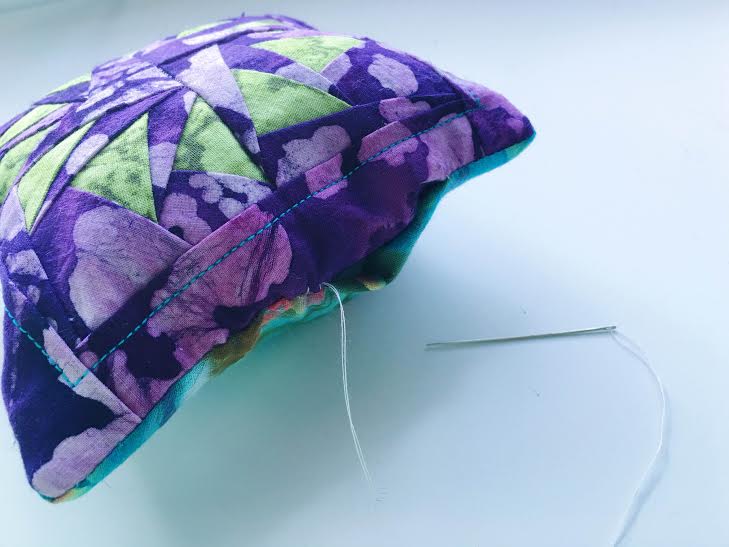
Some people hate sewing by hand, but I love the control it gives you. I certainly wouldn’t want to do an entire quilt by hand {I absolutely do not have that kind of patience}, but I will say that taking the time to blind stitch is totally worth it! It’s great for closing an infinity scarf or the interior of a bag and leads to a much cleaner finish.

I happen to have a giant bag of plain ol’ stuffing {I think I had visions of making throw pillows or maybe some fun softies/stuffed animals…} so I used that to fill the cushion. Lately I’ve noticed that my pins seem to be getting dull. Next time I may try stuffing a pin cushion with steel wool to keep my pins sharp {idea here}.
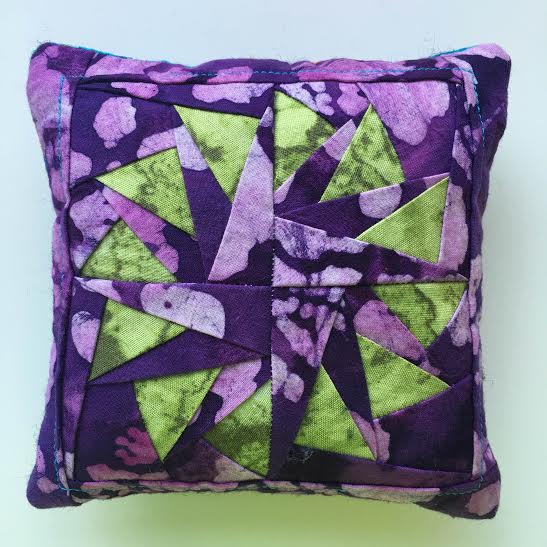
After some advice from my quilt guild buddies at our last sew-in, I pressed my seams to the side rather than open when I pieced the four little goose blocks together to make the full circle of geese. This really helped seal the center of the block and align the pieces perfectly {I’m quite proud of that center intersection!}. Here’s a good run-down of pressing your seams open vs. pressing them to the side if you’re interested 😉
I hope my partner likes her new pin cushion! 🙂
{PS: If you’re anywhere near Columbia, SC and enjoy sewing of any sort-and-kind, you should check out the Palmetto Modern Quilt Guild! You can follow the page on Facebook to see when the next meeting will be. The guild hosts monthly sew-ins which are super fun – I love being able to pick the brains of fellow [far more experienced] sewists!}

