
I know I’m wayyy late (like, a full month), but I couldn’t resist sharing a picture of my oh-so-festive Independence Day brunch at Eggs Up Grill!

Don’t worry – I suffered through a very humid run before consuming these tasty, festive treats 😉
Onward! To the beach quilt!
Remember that time I made my first quilt? Oh yes, me too. I love it so much…in all it’s flawed beginner glory. I love it so much that I make the Hubs lay it across our comforter every morning so I can see it when I get home! (I know, I’m a nerd.)
Anyhow – as soon as my Mom saw it she was all “Ohh..you should make me one to take to the beach.” After giving her the side-eye and replying that I don’t make things to go in or on the sand, I revisited her request (I mean…the woman stayed with my dogs for TWO AND A HALF weeks OVER CHRISTMAS. She’s a saint. I owed her).
I was planning to visit her this summer so we could walk go shell hunting at the beach. As my trip approached, the idea of a beach quilt floated in and out of my mind (mostly out)…until I ran across this Picnic Blanket Tutorial on Pinterest.
At first, I had planned to buy some terry cloth, but I was running low on time (and if I had to go to JoAnn’s in search of terry cloth, I’d most certainly lose a solid 4 hours after getting “lost” in all the other great fabric and craft supplies I so desperately need). In addition, I’ve been on a mission to purge my fabric stash (after realizing it was suffocating my creative process/sewing room/space to create, I purged and then offered free bags of fabric to my friends on Facebook. I highly recommend offering your Facebook friends things you want to get rid of. They jumped right on it! By passing my stash onto friends, I didn’t have to live in fear that my fabulous fabric might not make it to the sales floor of the local thrift store). On that note, I decided that I shouldn’t buy any new fabric for this project. In my Mom’s original request she said “you could use big pieces for my quilt so it wouldn’t take as long” (she’s thoughtful in her requests, right?!). Since I’d be raiding my stash for this one, her “easy solution” was great inspiration.
Step 1 – Find a large piece of fabric (or piece together scraps) that represents the size and shape you desire for your blanket. This will serve as your template for the quilt.
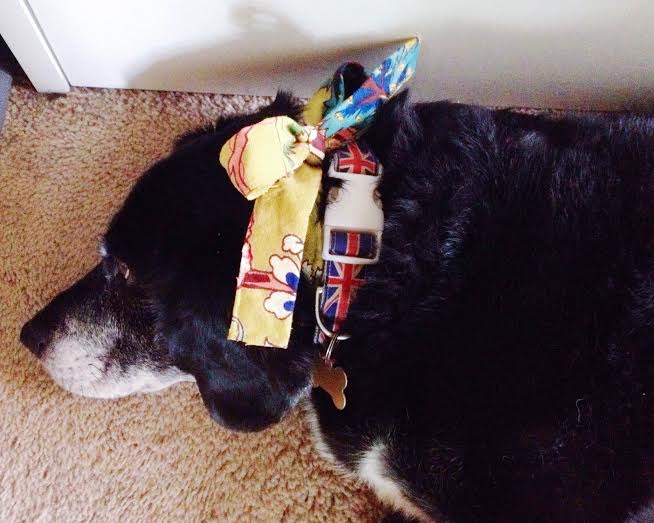
I had one beautiful curtain panel in my stash that had previously adorned the one window in my tiny dining room until the pattern had become too aesthetically busy. I knew it would be the right size for this – larger than a regular beach towel, but smaller than a traditional quilt. After cutting off all of the finished edges of the curtain, I laid it out flat to use as a template.
The unused curtain edges made a great doggy bowtie…
Step 2 – Find some batting.
There are lots of options here – you don’t have to use traditional batting. You could use an old fleece blanket, towels, flannel, etc.
Last year (while on the high from beginning my first quilt) I found a large white polyester-blend blanket at a thrift store. I bought it thinking it would make great batting (after some bleaching of course). The material wasn’t up to my standard of soft-n-cuddly so I knew I wouldn’t necessarily want to use it for a traditional blanket. It worked out perfect as batting for the beach quilt!
Step 3 – Cut your batting to match the size and shape of your “template” fabric.
Using the curtain piece as a template, I cut the batting to be the same size and set aside.
If you are using scraps of material for the batting, just sew the pieces together and trim as necessary until you have a piece that fits your original “template” (made in Step 1).
Step 4 – Gather fabric for your “top piece” (this will be the fancy side of your quilt that you will most likely use as the “top” so be creative with your selection).
For my quilt, I raided my fabric stash and stuck with large pieces of home decor / upholstery weight fabric for durability. I recommend using canvas, home decor fabric or upholstery weight fabric – something sturdy and durable.
I also recommend sticking with similar weight fabric (i.e. I wouldn’t recommend using lightweight cotton and upholstery together as it will cause one area to be heavier than the other. Additionally, the lightweight cotton wouldn’t be able to withstand the same wear-and-tear that the upholstery which may alter the look of your quilt in the future).
Step 5 – Piece together your quilt top.
Once you have gathered a stack of prints you like, start cutting the pieces to straighten the edges (basically: you want to turn your pieces into rectangles of sorts – all straight edges. Differing width and heights are fine for now – just focus on straight edges).
Now place your scraps on your template and arrange until you get the look you desire. Overlap them slightly (by about an inch) to ensure that your piece will be large enough to cover your template.
Starting with rows that use more than one piece of fabric to cover the quilt horizontally, sew the pieces together along the vertical seams so that they construct one long horizontal “row” that matches the width of your template. Trim the pieces so that the row is the same height across all pieces horizontally (making one long rectangle). Be sure to press the interior seams open and flat.
Once you have all multi-scrap rows constructed (you should have several rectangular rows now), lay them across your template in the order you want them to appear.
Step 6 – Begin sewing the rows together to build the top of your quilt.
I free-styled this (aka: made it up as I went along) so I don’t have great instructions. I used my basic quilting knowledge (piecing, pressing seams, squaring up, etc). If you have never pieced together a quilt top before, have no fear! You can do this with two giant pieces of fabric that are the same size and skip steps 4-6.
Starting from the top, take the second row and flip it up so that its’ right side is facing the right side of the first row. Align the pieces along the bottom horizontal edge and pin. Stitch along the bottom horizontal edge. Press the seams.
Now align the third row (right sides facing) to the bottom edge of the second row and stitch. Press the seams. Repeat until you have your entire top piece stitched together.
Step 7 – Make a quilt sandwich.
Layer the fabric flat (make sure there are no substantial wrinkles on any of the layers as you place them on top of one another):
1) Bottom layer: Quilt back [made in Step 1] facing right side up
2) Middle layer: Quilt top [made in Steps 4-6] facing right side down (so that your bottom and top pieces have the right sides facing each other).
3) Top layer: Batting [made in Step 3]
Step 8 – Pin the layers together.
Using a bundle of large safety pins, carefully pin the layers together. Since you are only going to be sewing around the edge of the quilt, you only need to pin around the edges.
Step 9 – Square up the top piece of your quilt.
Cut the edges of the quilt so that all three layers match along all edges.
Step 10 – Sew the layers together to hold in place.
Before you start sewing the layers together, make two marks along the bottom edge of your quilt (about 10-12 inches apart). This will be the opening that you use to flip your quilt – do not sew this area together in this step. If you are using extra fluffy batting or layers, you may need a slightly larger opening.
Starting at the left mark, begin sewing around the quilt until you reach the right mark (again: do not sew between these marks – this is the opening you will use to flip your quilt).
The seam allowance is not strict, but I recommend something larger (1 inch) to ensure that you are sewing through all 3 layers.
Step 11 – Flip your quilt inside-out so that the right sides are facing out.
Before flipping, trim the corners of your quilt (cut diagonally across each corner – be sure not to cut into your stitching).
Using the opening you left in Step 10, reach inside your quilt (between the top and bottom quilt pieces) and begin pulling the right sides out to “flip” it.
Step 12 – Sew around all edges of the quilt.
Once you have the right sides out (with the bottom and top quilt pieces in place and the fleece inside), tuck the edges of the opening under and pin. Starting with the opening, sew all the way around the edges of the quilt. I recommend a 0.5 inch seam (this seam needs to be slightly smaller than the seam you chose in Step 10 so that when you sew across the opening, you are able to sew all 3 layers to keep it securely closed).
Step 13 – Take your quilt out to play!
Congratulations! You just finished a fabulous beach blanket / picnic quilt / whatever-kind-of-blanket-you-want-it-to-be! I’d love to see your creations – tag me on Instagram when you share: @jordslice11.
For a little inspiration, here is the Beach Quilt I made for my Mom (she loved it by the way!):
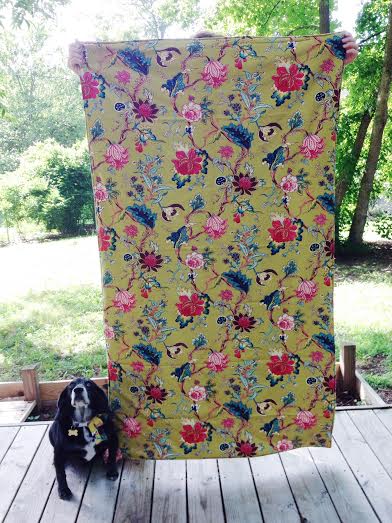
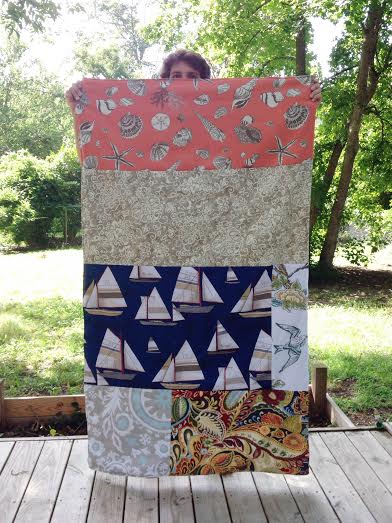
It’s hard to believe I had scraps that large in my stash. It sure felt good to use them up – this is a great scrap buster and easy gift!
I hope you’ve enjoyed this tutorial and are inspired to make something pretty for yourself! I’d love to see what you make – if you blog it, link your post in the comments and tag me on Instagram with your photos: @jordslice11.
{UPDATE: See my beautiful Mom enjoying the beach quilt here.}


Such a lovely quilt!!!! Great work and delicious breakfast.
Thank you!!
Jordan, I loved this. I enjoy reading your posts so much. You are one precious young lady. Keep posting!!
Sent from my iPhone
>
Thank you, Mrs. Nesbit! That means so much coming from you! 🙂 hope you are doing well!
Jordy,
That was SUCH a detailed (but easy to follow) instruction! However, I am SOOO happy that I don’t have to make one! LOL. I LOVE LOVE LOVE my beach/picnic quilt and will take it with me everywhere! Thank you and I LOVE you!!!!!!!!!
Mom
I’m so glad you love it Mom! You deserve it & I appreciate all you do for me! 🙂
Jordy – I can’t believe you were at Eggs Up Grill! Mine and Matt’s FAV place – that is my FAV breakfast too! Except I get it with the waffles (not all the time) Next time, please call us, and if you are so CLOSE we would love to see you – unless maybe you went to another one – ? I think there are so many now, Matthew and I went to Chas to school shop and went to the EUG in Mt. Pleasant – but the one in LF is still the best. Good breakfast at any of them, however! I miss you girls and your mom so much and I have enjoyed reading your blog and seeing all the neat things you are making! You are so full of talent – must be genetic! Thanks for sharing all of your talents and projects!
Thanks for keeping up with my blog, Aunt C! They actually just opened an Eggs Up Grill here in Columbia so Jeremy & I were at that location. Next time we’re near the coast, we’ll give you a call! Unfortunately, the dogs keep me at home a lot (which would be sad, but allows me a lot of creative time when Jeremy’s gone!). Give Matt a hug from us! xoxo